When the folks at Rust-Oleum asked if I would participate in their Paint It Pink challenge this month, I have to admit….my first thought was “Dude I have boys. What on earth am I going to paint pink?” But then I remembered that their challenge is to bring awareness to breast cancer. And breast cancer affects ALL PEOPLE. Even males get breast cancer. And I have sisters, nieces, aunts, friends, family and even you, my virtual friends who may be faced with this horrible disease one day (or maybe you are struggling with it right now!) and I would never want to turn down the opportunity to support these loved ones – especially if all it meant was painting something the color of the month!
I hope you join me.
I sincerely do.
Because this is an awesome cause and it’s super easy to make a difference. All you have to do is create a pink project….it doesn’t matter the size or time or WHAT….paint something pink….then just share it on social media with the #PaintItPink hashtag…..EVERY SINGLE PROJECT THAT IS POSTED = $10 donated by Rust-Oleum to Bright Pink (a non-profit orginazation dedicated to early detection of breast and ovarian cancer!)
I decided to make a growth chart. I have made one in the past and this time I wanted to make one for my little niece Isla. We call her Yaya. She is just the sweetest little thing I ever saw and the thought of her possibly struggling with breast or ovarian cancer was suffocating. She is only one year old! And I definitely want to see her grow to a ripe old age!
The process to make this is super simple. First get a 1×6 board and trace some small scallops on one side. Originally I did both sides and it wasn’t as cute as I hoped.
After you trace evenly, you may need to trim some off the bottom of the board. See how the little paint cans don’t reach the bottom of the board? I just created a straight line there and chopped off the excess.
You can make the scallops easily with a jigsaw.
Then sand the entire thing down. I used regular sandpaper for the curvy areas.
After it is sanded, I applied a coat of Rust-Oleum’s chalk paint in Blush Pink.
Chalk paint distresses really well so I wish that I had made a more ‘shabby chic’ piece but I know that my sister likes the non-distressed look for Isla’s room.
After I painted it, I realized that I had made a really long pink cloud. Or a sausage. Or a really long curling rod. Or an X-rated toy. Ruh-roh. That’s not the look I was going for. I am fairly certain my sister would have died laughing and then hid the gift in the closet. Brainstorm sesh was in order.
We ran it through the table saw and cut off one side to take it back to a growth chart and I think the crisis was diverted.
After I resanded the edges and touched up the paint, I started with the inch marks and then the numbers to indicate height. It helps if you just start at 6 Inches from the bottom (that way you can measure six inches from the floor and mark that and hang the growth chart accordingly!). I used Martha Stewart craft stencils (I think I got these at Michaels) and a metallic gold Painters pen to do all the markings.
After that was dry, I sealed the entire thing with a matte clear coat and waited excitedly for it to dry!
I can not wait to show Nornie and Yaya! It looks so cute!
The boys rushed over and loved it too! All of them knew exactly what it was too! #diesausagecloud
I think it’s the perfect feminine twist on a popular kid’s room decor item. And since I know how much we love our own growth chart, I have a feeling like it will hold sentimental value for them too! Off to go tag this on social media #paintitpink so Rust-Oleum donates the ten bucks. And if you decide to do your own pink project, I would LOVE to see it….just tag me too on Facebook or Instagram so I can ooh-and-aww over all those shades of pink!
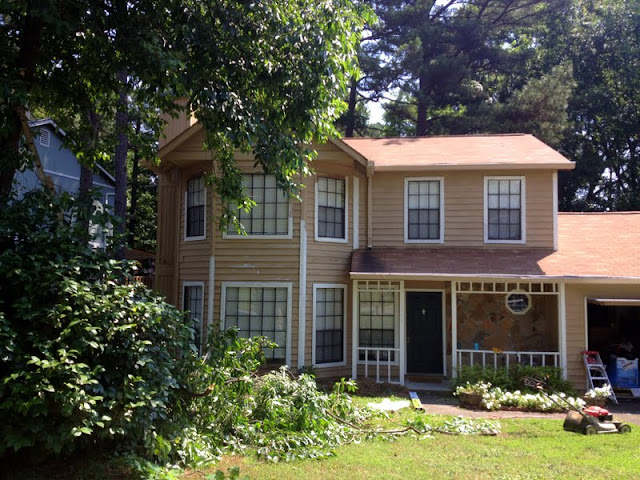
Ok, just so we’re clear on what I mean by “tree trimming” this close to the holidays, I’m actually talking about this hot mess:
An alternative title for this post could easily be called “How to cut down significant portions of tree and not kill yourself (or the tree) in the process.”
As I mentioned in the post about the wacky squirrel shenanigans I’ve had to deal with lately, I noticed that one of my trees in the front yard had branches that were a little too close to the house for comfort. And even though I’ve done the whole tree maintenance thing a few times over the last several years while owning this house (and once hired pros to take on the bigger stuff), I realized that I’ve also never really covered much in terms of how the DIY process typically goes when trying to get rid of excess tree limbs. So, here are a few tips that you might find useful whenever you think about tackling trees yourself.
First: Why bother?
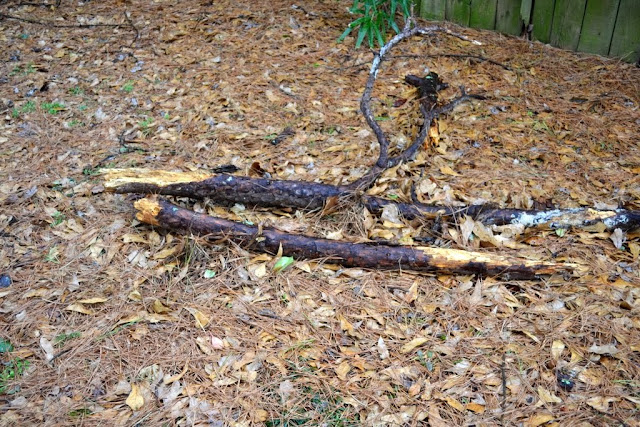
Other than things like a tree’s limbs getting too close to your home (or over the roof), there are a number of other reasons to prune a tree. For one, dead or dying limbs are a hazard; there’s a reason that dangling branches are called “widowmakers”! They may look like a stick from way down on the ground, but they are very (as in loss-of-consciousness-or-even-death) heavy. A direct connection with one of these could cause your window to break, or, you know… a broken skull.
Keeping dead limbs away from healthy growth also keeps bugs, rot, and disease from infecting the rest of the tree or other plants… which could potentially turn a simple dead limb into a large, dead tree that could fall onto the house in very little time. Thinning a dense canopy of branches also allows sunlight to hit the ground and increases air flow, which also results in less disease. Not to mention, a freshly trimmed tree often makes whole yard just look more aesthetically pleasing and less like a haunted house (hint hint, neighbor down the street).
For the most part, this is very much DIY-able.
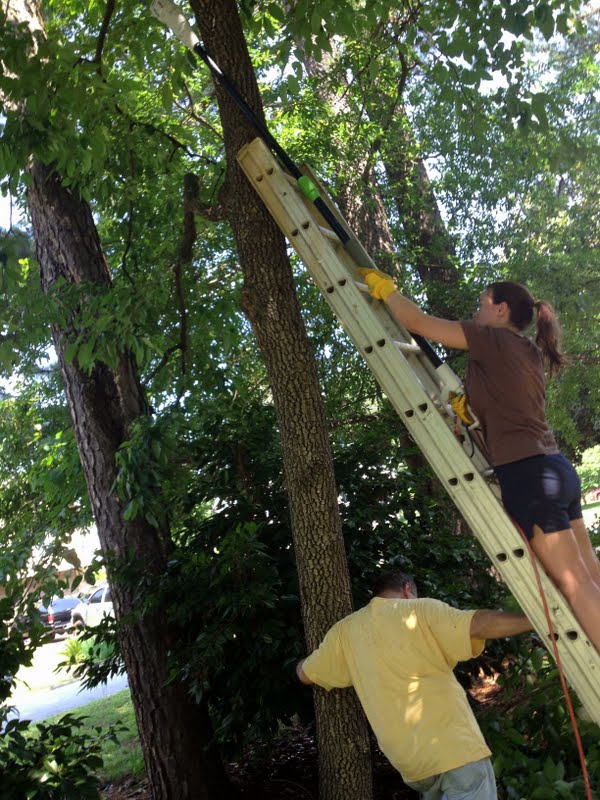
I get that climbing a ladder, working with a chainsaw-on-a-pole thing above your head, and relative uneasiness about combining these two things with heights isn’t always easy to keep that lump in your throat from making you chicken out. I even have a little fear of heights myself. But as long as you have someone reliable holding the ladder below you, you use the proper gear (such as safety goggles and rope), and you stay the hell out of the way from a falling branch (or potential one, as the case may be), there’s no reason you can’t take care of plenty of tree maintenance on your own. For larger stuff, such as taking out pine trees or limbing ones that go way over your head, it’s better to call a pro, but the typical scenario I find myself in is just lopping off a few that are closer to the ground. And saws on extension poles actually do go a long way.
How to Avoid Tree Death (Over-pruning)
One of the best tips I received from one of the tree pros is the answer to the question, “How much should you trim from a tree at any given time?” The answer: no more than 15-20%. In my opinion, ten percent is a good rule of thumb for DIY (since it’s easy to get carried away). Then give the tree a few years to recover from its wounds. Over-pruning hurts the trees ability to create food for itself (all of those leaves, if you recall from your elementary science classes, help with photosynthesis) and a healthy tree keeps opportunistic pests at bay.
One thing I’ve recently learned as well is that it’s important to cut the right spot on the branch you’re trimming; cut too close to the trunk, and you create an opportunity for bark issues to infest the trunk; cut too far down the limb, and you create a dead branch that the tree won’t “heal” properly and give you a widowmaker situation to look forward to in the future. (Of course, in awkward situations where I’m really anxious to get down off the ladder, what’s ideal is not always my #1 concern; if the branch is on the ground, I might consider trimming it back further to get it closer to the trunk, or I might leave it and call it a day. It usally depends on whether or not I’m hungry and my arms are tired from holding a heavy pole saw.)
The Right Tools*
Ladder – Use an A-frame ladder for lower limbs and an extension ladder further up the tree (or one that can be both, like the one linked to). To help stabilize the ladder, definitely use a buddy at the bottom to hold the ladder while you climb. Your buddy can also hand you things like pruners, rope, and pole saws.
Rope – I don’t really mess around when it comes to heights (unlike Charlie). So when I know I’m going to be on a ladder up against a tree, it helps me feel much more comfortable to tie the upper area of the ladder to the tree. It rocks less and reduces slippage.
Pruner/Lopper – You can actually accomplish quite a lot with two-handed pruning shears. They actually make me feel pretty badass at the limited amount of force it takes compared to the pile of clipped branches I can create in just a few minutes.
Telescoping Pole Saw – If you’re going to do this often enough, buy an electric one instead.
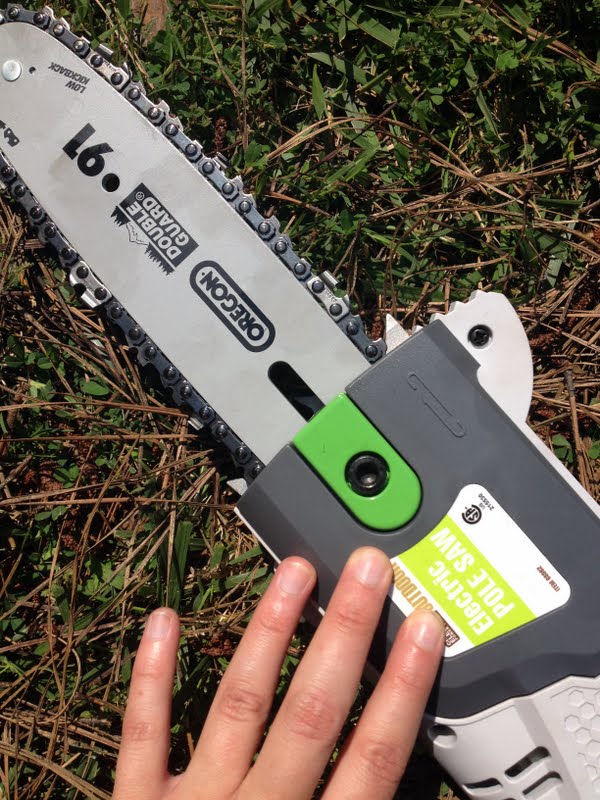
Electric Pole Saw – After, oh, the first time I used the manual pole saw, I was quickly converted to the electric version. It’s a lot heavier when you’re holding it in the air like this, but being able to just move the saw in place and let it do the majority of the work is especially nice on thicker limbs.
Safety Tips
I already mentioned the rope part above, but there a few other important things to remember. A lot of these tips are basically the same rule: get the hell out of the way. But you’d be surprised how many times you have to remind yourself of this, so it bears repeating for every scenario this occurs.
Wear safety glasses. Cutting through wood with a chainsaw on a pole will have splinters flying everywhere. Best not to get one in your eye.
Loop the electrical cord. One of the most frustrating things when using something like a saw is the way the electrical cord slips out of place. A good way to keep this from happening is to first pull the cord through the hole in the handle, around the back of the handle and then plug it in.
Don’t ever position the ladder (or yourself) where the branch is likely to fall. You want to have access to the branch, but not be directly under it (again, falling limbs crash down a lot harder than you think they will). Branches usually begin to fall when you’re about halfway through, so they will swing down against the trunk. Gravity alone may be enough to bring them the rest of the way, so you won’t have time to move. Plan accordingly.
Move the ladder. I get it; the branch just above you is super tempting. But don’t do it. Re-position the ladder out of the way, then climb back up and cut.
Position yourself comfortably first, then grab the saw. This is why it’s helpful to have someone below the ladder to both help stabilize it and then hand you the saw. The electrical version is what I prefer, but it’s much heavier, so you get tired faster from holding it in the air (and it’s top-heavy, which makes things even more cumbersome). You can hand it right back down when you’re done, too!
If the pole saw gets stuck in the branch, you might have to back away for a while. It felt kind of dumb to just leave the saw dangling in the air and in the branch, but any amount of wiggling and running it only pinned it further into the tree (and also could have burned out the motor if I kept going). By the time the conversation about what to do next ended, gravity pulled on the branch enough to free the pole saw and it all came crashing down. If this ever happens to you, be careful not to walk under the tree until the branch is down. Even if you try to get a rope around it and pull it down, never do it from under the tree!
Cleanup
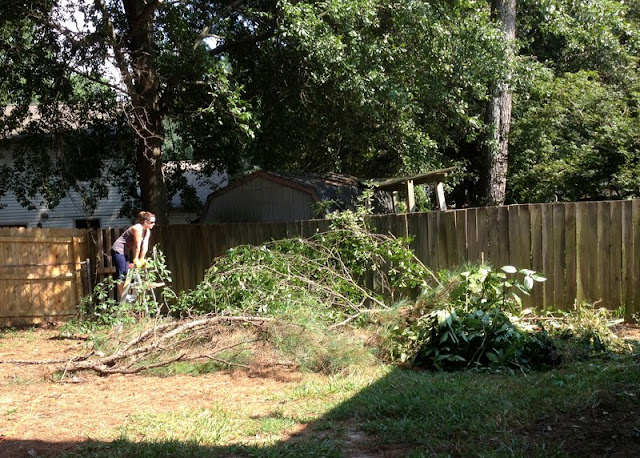
I learned this from observing my professional landscaping neighbor: when you’re taking the limbs out to a truck, clip everything down into manageable pieces. But the magic actually happens in the bed of the truck. Branches won’t lay down on their own usually, but you can often cram a lot more into the bed of the truck by climbing on top (using your body weight to collapse branches) and using your pruning shears to continue clipping at branches that refuse to lay flat. Clip, stomp, clip, stomp, clip, stomp. Even when thinking it’s full, doing this has turned many “this is going to be two trips for sure” into one.
*affiliate links – if you buy these online from these links, it sends me a few pennies for the referral
I’m currently sitting at my computer with painful shin splits, which means that the steps I need to get down and out of the house and I are not on speaking terms right now… not that I usually talk to my stairs, but… meh… my legs hurt and I don’t feel like coming up with a more clever way to describe that right now. I’m sorry.
All I need is a little R&R, but the softball doubleheader that caused the aforementioned injury has me walking in a way where I feel old and look constipated, so I’m generally acting a little more Danny Glover than usual.
And even though it also feels like my to-do list is longer this month than last, I still have some new (albeit far more boring than squirrel fights) house progress to report. So let’s start with the exterior! Overuse of exclamation points to make it seem exciting!
First: new shrubs! Last year, I took out some of the older shrubs near the front windows that I thought were too far gone to really “work” anymore. They were a different variety than the holly nearby, and the growing patterns between the two types often resulted in big, empty bald patches when I sporadically neglectfully got around to trimming each hedge. So to keep things equally shiny and green across the board, the new shrubs will more closely match the existing ones and will hopefully fill in nicely over time. Mulching, on the other hand… haven’t really convinced myself to do that yet. Even though there are far fewer trees in the yard, pine straw will begin wafting over from other neighbors soon enough, so I’ll probably address it then.
Second: other new shrubs! As part of the huge clearance-inspired planting from September, I also bought another one of the lovely-colored shrubs that have grown so nicely and (more importantly) low-maintenance in the garden bed since moving in. It’s now planted in the bare spot on the left side of the front porch where there should be more visual balance to the three on the right, along with some purple phlox (that nearly died but is quickly bouncing back and hopefully getting established before cold temps settle in). The shrub, which I forget the name of again (it’s hell getting old… or just feeling old, as we’ve established), grows fast and changes color (bright green, green with red tips, pale green with white flowers, etc.).
So basically, everything should all look more cohesive in the spring.
Third: Fewer tree limbs! I mentioned in last week’s post that a tree in my front yard had branches too close to the roof (for reasons that I won’t dwell on because it requires thinking about a certain bitchy rodent). I trimmed the closest ones since then (and will have a DIY tutorial to share on it), and all is right with the whole tree-to-roof (or lack thereof) situation.
Fourth: Lawn guy! I think I may have found a local guy to maintain the yard and won’t cost me a fortune. He’s knowledgeable and does all the parts that are a huge pain (such as all of it), so I may have finally reached a break even point between my willingness to do the labor and my uncompromising frugality. Crossing my fingers on this one, but so far so good. One less thing on my plate and my yard looks snappier and trimmed up for pictures. Win-win.
Finally: Trim painting! while I haven’t done a lot of it yet, the amount I have tackled in the last few days is already making the chimney and view from the curb more complete. I’ve got the extended ladder propped up outside, so as soon as these shins start working properly again, more portions will be done.
Not bad for a busy week, but there’s still more to come very soon: the basics of how to trim tall trees (what you need to know), and the first peek at all the new paint and molding in the kitchen!
My oldest has always been obsessed with throwing. Always. My mother warned me. She said “You think it’s funny and cute…..now. But just you wait.”
Well mom….here are those magic words….you. were. right.
Not a day goes by when I don’t say about thirty times (no exaggeration) DO NOT THROW IN THE HOUSE. Of course, once Will discovered that there is an actual sport that involves throwing small spherical objects, he was hooked. As a three year old, he would sit and watch a baseball game on tv. Not the entire thing or understand what the heck is going on….but he knew that there was throwing, running and hitting…and he was GAME.
We signed him up for baseball this past spring and he was on a team that had much bigger and more experienced boys. He rarely hit the ball and only caught a couple of rolling balls but boy did he make his little five year old legs hustle! He would chase those hit balls down like a tiger hunting prey! He would run those bases like it was his job! And he would slide whenever possible. And he even received a game ball (admittedly each person on the team got a game ball because they won a lot).
And this fall he played again. He actually got placed on the A’s again! He improved soo much from last season and he seems to LOVE everything about the sport. This season we went to one game where the A’s were down a few runs and in the last inning it seemed like a long shot for Will’s team to win. He had already hit two home runs in that game and somehow the boys slowly started gaining momentum! The end of the very last inning, bases were loaded, two strikes, down by one run and Will nailed it! I was that mom praying silently on the sideline (I know I know)….as soon as the ump saw the kids tag the home plate, he called the game….WE WON! (I say we because I played a very important role as official crazy camera lady.)
He got the game ball and nobody was more excited than my little man
(Game ball #1 & Game ball #2) (and Pringles container by Weston!)
I promised the little man that I would build him a baseball holder but he had to do it with me and I think it turned out pretty darn cute
It was kinda complicated for me to figure out the angles (especially the boards were slightly warped) but eventually I got it where I was happy. If you want to make one yourself, it is not too hard but you will need a brad nailer and a miter saw.
The frame itself is shaped like a home plate….ya know…cause mama loves themes The boards that have angular cuts are all 40 degrees. Here is the cut list –
Top frame piece – 1 x 5 x 17″
Two side pieces – 1 x 5 x 11″
Two diagonal pieces – 1 x 5 x 10″
Two shelves – 1 x 5 x 15 1/2″
One small shelf – 1 x 5 x 5″
We couldn’t find 1×5’s at the store so we ripped 1×6’s down with the table saw. After you cut the frame pieces, you can tack them together with a brad nailer. It may seem a little flimsy at first but don’t worry – it will be super sturdy by the end of the process.
Next you will want to put the holes in the three shelf pieces. The two big shelf boards get four holes each and the little five incher gets a center hole. Mark your holes so that they are centered from front to back but also evenly spaced. We used a 2″ hole drill bit attached to the corded hammer drill.
Once the boards are drilled and sanded, you can place those in the sanded frame.
The shelves also get brad nailed into place. Make sure you use long enough brad nails
Next comes painting! I was going to make the base white and distress it but then Will decided that he wanted it red. I should have known. Red is his favorite color I had leftover paint from other projects that I used….it’s Valspar’s front door red in satin.
Will is so pumped that he got to do the painting. (For those mama’s who like a even paint job but want to include the kiddos on projects like this – all you have to do is take turns! They can lather up those boards and get the paint everywhere while you go smooth drips and clumpy bits out! Win-win!)
And this picture perfectly illustrates the phrase “watching paint dry”. Gotta love the daddy tshirt and shorts
So as the frame part is drying, you can transfer the entire piece to a thin 1/4″ piece of plywood and trace the edges to make the back. I cut mine out with a jigsaw.
You will want to paint the back before attaching it. I sanded mine, painted it and then distressed the entire piece with Rust-Oleum Kona stain before tacking it on with the brad nailer.
In order to hang it, I screwed a couple D hooks on the back and put some thin wire between them.
I mean seriously. Look at that kid. He is super proud. Also, he said that one day we will have to build him one as big as a house for all the game balls he will win. #competitivemuch
We decided that the perfect place would be in his room next to his tiger art. We figured that it would be in a place where he could see the balls everyday but the little babies wouldn’t be able to touch them. Also….that is a giant spiderman doll in the corner. My mother brought it over and the boys are obsessed with it.
After it was hung, we banged on the furniture and did a drum roll while Will placed his game balls in. It’s important to make things as dramatic as possible.
So there you have it folks….one baseball holder fit for a home run king! So cute, right? I know some grown ups that would love this too! And it’s perfect for personalizing. Happy building!